Some spiders build webs which spiral into a central point in the middle. Can you program Edison to drive so that the robot spirals inward, like a spider laying a trap?
To program Edison to lay a spiralling spider trap, there are a few things we need to learn:
- Part 1: What is an Edison robot?
- Part 2: How do you use EdScratch with Edison?
- Part 3: What are variables?
- Part 4: Your turn! The spiralling spider trap
Have you used Edison robots and EdScratch before? Jump straight in at part 3!
Part 1: What is an Edison robot?
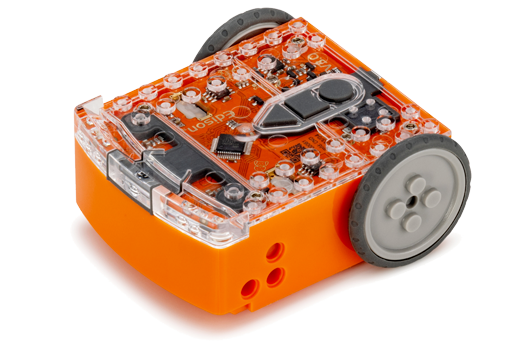
This is Edison, the programmable robot.

There’s a lot we can do with our Edison robots. We can program the robot to do things like drive using its motors, flash its LED lights or make sounds. Edison also has different sensors which we can use to get the robot to behave in different ways.
Edison uses sensors and motors to interact with the world. The robot also has three buttons, a power switch and several removable parts. Knowing where Edison’s parts are and what they do will help you use Edison.
Have a look at the top of your Edison robot. Try to find all of the parts labelled in the picture on your Edison robot.

Flip Edison over. Look at the picture and try to find all of the parts labelled in the picture on the bottom of your Edison robot.

Part 2: How do you use EdScratch with Edison?
One of the best things about Edison is that you can make your own programs for your robot! To write a program for Edison, we need to use some special software.
The software we will use with Edison is a robot programming language.
The programming language we will use is called EdScratch. Let’s learn a bit about the EdScratch programming language.
Check out EdScratch
You can access EdScratch online.
Here is what the EdScratch environment looks like:

The EdScratch programming environment has four main parts:
Block pallet
All of the blocks you can use are in the block pallet. To use a block, select it from the block pallet, and drag it into the programming area.
Programming area
The large area where you can connect blocks together into programs is called the programming area. Drag and drop blocks from the block pallet into this area to use them in your program.
Menu bar
Options such as ‘Save’ and ‘Load’ are accessed from the menu bar. The menu bar also has the ‘Program Edison’ button.
Bug box
Below the block pallet and programming area is the bug box. Warning messages will show up in the bug box.
Look at EdScratch on your computer. Find each of the four main parts of the EdScratch environment.
Load and download the test program
EdScratch has some demo programs already written. Try loading and downloading the demo program called Test_program.
Load the Test_program demo program
To load the demo Test_program, follow these steps:
- In EdScratch, go to the menu bar and select the menu drop-down. Find and select the option called Load Demos. This will open a pop-up window with all of the demo programs.
- Find and select the program called Test_program. The program will load in the programming area.
Here is what the Test_program looks like:

Once the program loads in the programming area, you can download it to your Edison robot.
Download Test_program to Edison
Whenever you want to download a program from EdScratch to Edison, you need to follow these steps:
- Connect Edison to your computer using the USB cable.
- From the EdScratch app, press the ‘Program’ button (top right corner).
- A pop-up window will appear asking to connect to Edison V3. Select ‘Edison V3 – Paired’ and click ‘connect.’
You will hear the program downloading to Edison. Once it is done downloading, Edison will make the ‘success’ beep. Don’t unplug Edison until you hear the beep!
After you hear Edison make the ‘success’ beep, carefully unplug the USB cable from your computer and tuck it back under Edison. Press the play (triangle) button one time to run the program.
Part 3: What are variables?
In EdScratch, there is one category of blocks that looks very different to the other categories when you first open it: the Data category.

When you first click on the Data category, there are no blocks available for you to use in an EdScratch program. Instead, there are two buttons: the Make a variable button and the Manage variables button. By using the Data category, we can create variables to use in our EdScratch programs.
In computer programming, we often use the same bit of information multiple times in a single program. Variables make it a lot easier to do this. Using variables in programs lets us tell the computer to store a specific bit of information inside a variable. We can then use that variable in different places in the program. Any time the computer sees the variable, it will recall whatever information is stored inside the variable.
In EdScratch, when you click the Make a variable button, a pop-up window will open up asking you to give your variable a name. Giving variables good names is important: you want the name of your variable to make sense to you and tell you what bit of information is stored inside.
Your EdScratch variable names can only contain lowercase English letters, uppercase English letters, numbers, and underscores ( _ ). Other symbols, like exclamation marks ( ! ) or spaces, are not allowed.
Give your variable a name that will help you identify what type of information is going to be stored inside the variable. If you want to change the name of a variable after you make it, you can do that using the Manage variables button.
Once you make and name a variable, it will appear in the Data category along with some other special blocks including the set block, the increment block and the decrement block. You can then use these blocks along with your variable in an EdScratch program.
Trace the code
In EdScratch, we can use variables to store different values. Because these values are numbers, we can then do different things with these numbers, like compare them to other values using operators or do computations with them.
Look at the following program:

This program uses a variable named DriveLength.
It is important to note that a variable represents a value that is set somewhere in your program. That’s why you always need to use code in your program to tell the computer what to set the variable to be.
This is what the set block in this program is doing. At the beginning of the program, the set block sets the variable DriveLength to be 1. The value of DriveLength isn’t going to stay set to 1 forever, however. That’s because this program uses another block from the Data category, the increment block:

The increment block is inside the repeat loop and changes the variable DriveLength to a new value. What is this block changing the variable DriveLength to be?
That will depend on where in the program you are up to. In other words, it will depend on how many times the repeat loop has run.
When our program first starts, DriveLength will be set to 1, but because there is an increment block inside the looped code, the value will change each loop.
DriveLength is also being used in another place inside the looped code in this program:

The input value of this wait block will depend on the value of DriveLength and will also change each loop.
Be careful though!
While the value of the wait block will change depending on the value of DriveLength, this wait block will not change the value of DriveLength. Only a block from the Data category can change the value of a variable.
You might also notice that this wait block is set to milliseconds, not seconds.
Remember, 1 second = 1000 milliseconds.
Let’s trace the program to work out what the value of the variable DriveLength and the input value of the wait block are going to be at different points when the code in this program runs.
Trace through the program to work out the values. Fill out the table with what the starting value of variable DriveLength will be at the beginning of each loop repetition, what the input value of the wait block will be in that loop, and what the new value of DriveLength will be after the increment block inside the loop runs. The first two rows have already been filled in for you.
| In loop # | Starting value of DriveLength | Wait block input value (in milliseconds) |
New value of DriveLength |
|---|---|---|---|
| 1 | 1 | 200 | 2 |
| 2 | 2 | 400 | 3 |
| 3 | |||
| 5 | |||
| 7 | |||
| 10 |
Write and run the program
What is the program going to make the robot do when you run it in Edison?
Write the program in EdScratch. Download it and run it in your Edison robot to see what it does.
Part 4: Your turn! The spiralling spider trap
Using what you have learned about variables, write a program in EdScratch that will get Edison to drive in an inwards-spiral shape. Edison should drive, then turn, then repeat over and over, spiralling inwards, just like a spider laying a trap.
Your program should use a variable to help you control how far Edison drives each time.
Think about how far you want Edison to drive each section compared to the previous section. How many sections will Edison need to drive in total?
You will also need to decide how far Edison should turn between each driving section.
Download your program and test it using your Edison robot. Experiment using different input values to see what works best.

Bonus challenge!
Can you make Edison leave a ‘sticky spider thread’ trail behind the robot as it drives? Use something, like some string, to represent a spider’s silk. See if you can engineer a solution so that Edison leaves a trail behind it as it drives.